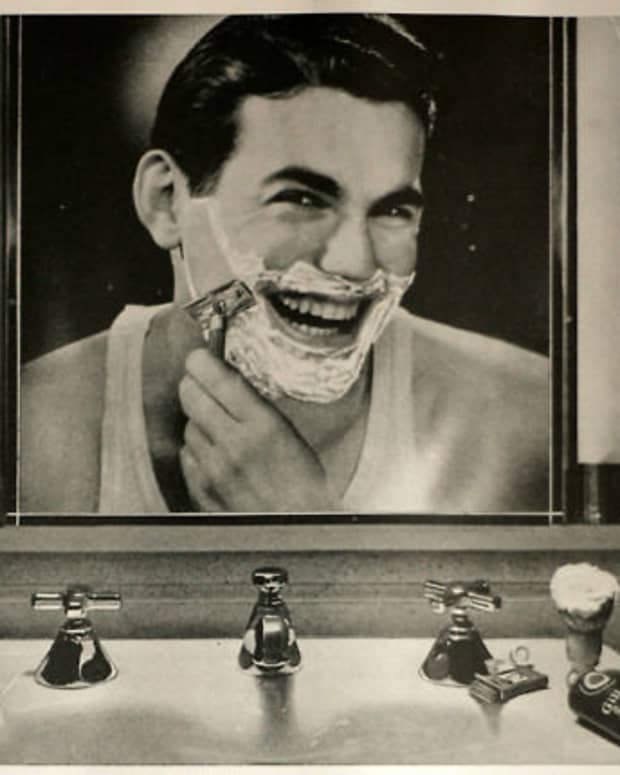
How to Get Rid of a Five O’Clock Shadow
A beard-grooming enthusiast who writes about beard products, styling and other related facial hair trivia who also sports a beardstache.
How to Remove Your 5 O’Clock Shadow
Even after you have trimmed your beard with a beard trimmer at its closest setting, you can still get the remnants of the 5 O'Clock shadow, so this guide will help those who are trying to achieve the closest shave possible.
You've got three methods when it comes to getting rid of the 5 O'Clock shadow:
- Shaving
- Waxing
- Laser hair removal
Proper Skincare Is Essential
Before we get straight into getting rid of stubble, I want first to stress the importance of good skincare. Whether you want to grow or get rid of a beard, get into the routine of washing, moisturizing, and exfoliating your face. It will help to remove dead skin cells, dirt, and bacteria which can cause ingrown hairs.
Method 1: Shaving
Shaving is probably the most common method of removing facial hair. I've put together seven steps that will help you get the closest shave possible.
Follow these Steps to Put Your Best Clean Shaven Face Forward
- Prepare your skin
- Use a brush to apply shaving cream onto your face
- Pull your skin back and perform short strokes
- Rinse your blade after every stroke
- Apply a second layer of shaving cream and go against the grain
- Rinse face with warm water and close the pores with cold water
- Finish it all off with an aftershave
Now let's look at each step in more detail just below.
Shaving Supplies
- A high-quality safety razor with multiple blades
- Shaving towel
- Shaving cream and brush
- Alcohol-free aftershave
- Pre-Shave Oil
- Moisturizer
Why a Safety Razor?
When it comes to trying to get rid of the stubble shadow, the safety razor with multiple blades is better than a beard trimmer. Of course, there are pros and cons to both, but razors can get a closer shave. They also require more care and attention.
Of course, you can get good and cheap razors, but I'd recommend avoiding disposable razors and opting for something that is properly built for the job. There are some great options out there for a specifically built model to give you a close-cut shave.
Step 1: Prepare Your Skin
Before you go straight into shaving your beard with a razor, you want to first prepare your skin with what’s about to come.
The best way to do that is to head to the bathroom sink and splash your face thoroughly with warm water or take a warm shower. Here, we are looking to expose the pores on your skin and help ease up the hairs for when it comes to shaving.
Then pick up a nearby shaving towel to gently pat dry your face.
Step 2: Apply Shaving Cream to Your Face
When applying shaving cream to your face, you first want to get the shaving brush, dip it into some water, and then into the shaving cream. Then apply it in a circulating motion to your face.
The idea here is that we want to create a thick lather for the hairs on your face because it raises the follicles and helps to aid in the exfoliation of your skin.
Read More From Bellatory
Make sure you use a proper shaving cream that will be kinder to your skin and result in a smoother finish. You want to avoid the cheaper ones that contain certain ingredients, such as menthol, that will actually close up your pores and make your beard harder to shave.
If you have particularly sensitive skin, you'll want to make sure that you are also using a pre-shave oil explicitly designed to help ease those prone to irritation as it helps to ease razor drag and friction.
Step 3: Pull Your Skin Taut and Perform Short Strokes
Now you have got your facial scruff nicely lathered up with your razor in hand; you want to start shaving. Before doing so, make sure that the razor blade is sharp (and not dull); if it isn't and your face isn't properly lubricated, this can result in a nasty case of potential razor burns and the promotion of ingrown hairs.
To start shaving, you want to pull back parts of your skin so that the skin becomes taut. This then allows your beard hairs to raise up, making it easier to shave while getting a closer result too.
You want to glide the razor rather than apply pressure. The weight of a good quality safety razor should be doing this for you. In the first phase of shaving your stubble, you want to take note of your hair's direction and follow it along. This is a lot easier said than done since hairs go in all kinds of directions. However, it's essential to carry this out, as you will get a much finer and closer shave than if you were to go in whichever direction you like.
Step 4: Rinse Your Blade
Make sure that you are regularly rinsing your razor blade with warm water. This keeps it from clogging up, plus the use of warm water allows your skin pores to remain exposed and the hairs soft.
Personally, I would recommend that after every stroke, that you give the razor a quick rinse under the sink.
Step 5: Shave Against the Direction of Growth
Now, once you have completed the first phase of shaving your stubble, most of the hairs should have gone. However, there is another second phase to carry out. Again, like you did the first time and apply a second layer of shaving cream.
The objective now is to get your razor, again, making sure you are holding it at the proper right angle. Pull the skin taut, but you want to be going the opposite direction of growth of what you carried out initially, going against the grain.
Step 6: Rinse Your Face With Warm Water
Now you’ve finished removing the stubble from your face; you want to rinse your face with warm water.
Remove all the straggling hairs and reach for the towel to pat it dry. Remember, your skin is susceptible at this point, so be nice to it. Ensure that there is no rubbing or severe stretching of the skin or any pulling.
Step 7: Finish Off With Aftershave
Now to finish, you want to reach for an appropriate aftershave that you can apply to your face. This will help restore moisture to your face and recover from the irritation as you go about your day. You certainly don’t want to use an aftershave with alcohol, as it can dry your face out and be irritable.
Ideally, it has some moisturizing element to help replenish the lost oils that will have been removed with shaving. Plus, a moisturizer will help to soothe and quash any potential irritation caused. Feel free to top up on moisturizer at a later period to help with any spots of your skin feeling dry.
Add a small portion of aftershave balm and apply it evenly over your face. Somewhat ironically, beard oil will actually be an excellent product to apply to your face after a shave as it will help replenish the lost moisture, plus it’s great for smelling good.
Method 2: Waxing
To get rid of the 5 O'Clock stubble, this is both an incredibly painful process and one that really we don't highly recommend. Does it work? Sure. You are literally ripping out the roots of your beard in order to achieve this look.
However, the positive outcome of waxing is that the hair follicles will come back thinner and less often the more you wax. Meaning, after a few waxes, you will have less and less hair to deal with.
Ultimately, we don't really recommend it because of the pain it can cause, and there are alternative, less painful methods.
Method 3: Laser Hair Treatment
You also have the potential opportunity for long-lasting impacts with laser hair treatment, though it can be pretty expensive. Before doing laser, you'll need to consider, "Is this something I really want a long-term solution to?"
Many studies indicate that stubble is quite attractive on men, so it's always nice just to have the option of growing out a stubble if you want to in the short term.
While the pain isn't the same as waxing, it still is somewhat uncomfortable. The sensation is similar to getting a tattoo or something of that nature. Not the worse pain you'll ever experience but surely not a walk in the park.
Good Luck!
Of course, let us know if you have any questions and concerns with regards to how to get rid of a 5 O'Clock shadow, and I'd be more than happy to help you. Simply, leave a question in the questions and answer box below.
This content is accurate and true to the best of the author’s knowledge and is not meant to substitute for formal and individualized advice from a qualified professional.
© 2019 Jonathan Lees

