DIY Fashion: How to Ombré Bleach or Bleach Dye a Shirt
An eager DIYer and crafter, Donna enjoys sharing fun and creative tutorials with others so they can learn from her successes and mistakes.
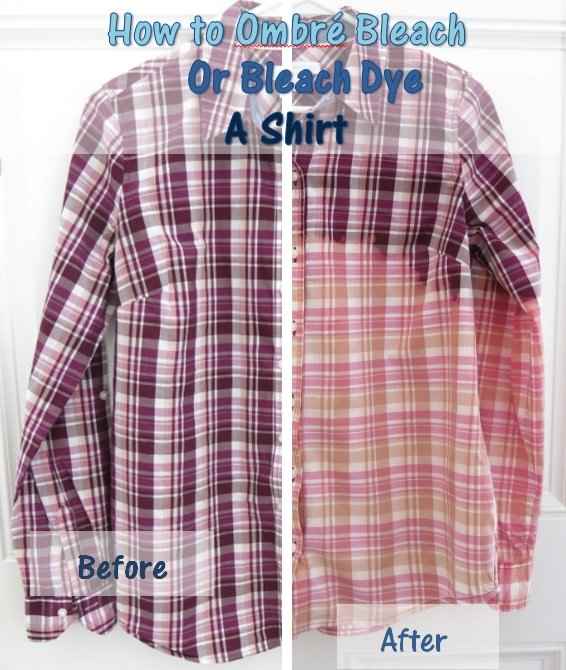
How to Ombre Bleach, or Bleach Dye, a Shirt
(c) purl3agony 2016
Ombré bleaching of clothing (sometimes called "bleach dyeing") is a popular fashion trend where the color on a garment gradually fades from top to bottom or from bottom to top. This effect is created by using bleach to alter the color dyes in the fabric. These clothing items can retail for hundreds of dollars, but this technique is easy to do yourself using household supplies.
This fashion trend might not appeal to everyone, but the results can be quite pretty. Please keep in mind: When bleaching an item of colored clothing, you really have no idea how the colors might change. You can take a black shirt and put it in bleach, thinking that it will turn to a lighter gray. However, you may find that the black color of the original shirt was actually a deep color of purple, and, after bleaching, you now have a lavender shirt. So for this look and technique, you just have to keep an open mind and love the results of the bleaching, however it turns out.
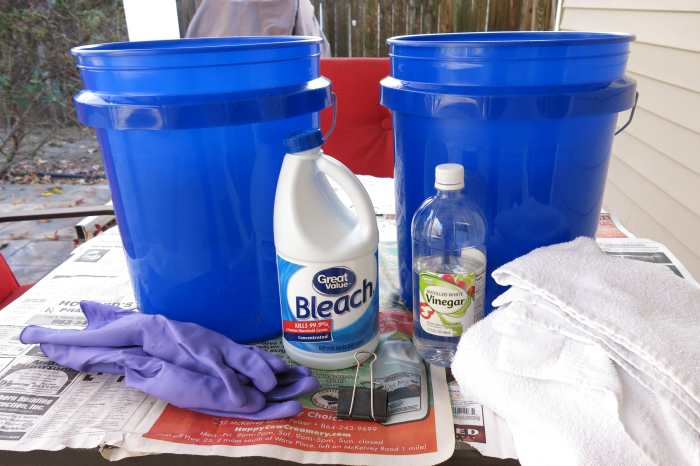
Materials for ombre bleaching a shirt at home
(c) purl3agony 2016
Materials for Ombré Bleaching a Shirt
- A colored shirt—This can be any type of shirt. You may want to use a couple of old shirts first as test runs before trying this technique on any clothing that you truly treasure.
- One or two large, clean buckets—You can do this technique with one bucket, but it is easier with two so that you don't have to run to change the water.
- Water
- About a 1/2 gallon of bleach
- Some distilled white vinegar
- Plastic gloves, like you would use for household cleaning
- Safety goggles to protect your eyes (I didn't use these, but I should have.)
- Some old towels
- A binder clip or hanging clothespin
- Some newspaper to cover your work area
Preparing Your Work Space for Bleaching
- I would suggest you work outside for good ventilation, since you are handling bleach.
- A well-lit area with a tabletop that you can use is best.
- Cover your work area with newspaper in case your bleach drips or spills.
- I would also suggest wearing old clothes and/or an apron while you work to protect your clothing.
- Be sure to always wear your safety goggles and gloves when handling the bleach, the bleach mixture, or your wet piece of clothing.
Ombre bleaching, or bleach dyeing, a shirt
(c) purl3agony 2016
How to Ombré Bleach a Shirt
1. Make sure your item of clothing is freshly clean and dry. You can use any type of shirt; however, a heavier shirt (like flannel or denim) will probably take longer to change color.
2. Decide where you want to start your ombré bleaching on your shirt. I put my shirt on and decided that I wanted the color change to start between my second and third buttons from the top of my shirt. You can also bleach your shirt from the bottom to the top by putting your shirt in the bleach mixture upside-down.
Also decide whether you want to bleach your shirt's sleeves along with your shirt, or leave them as is.
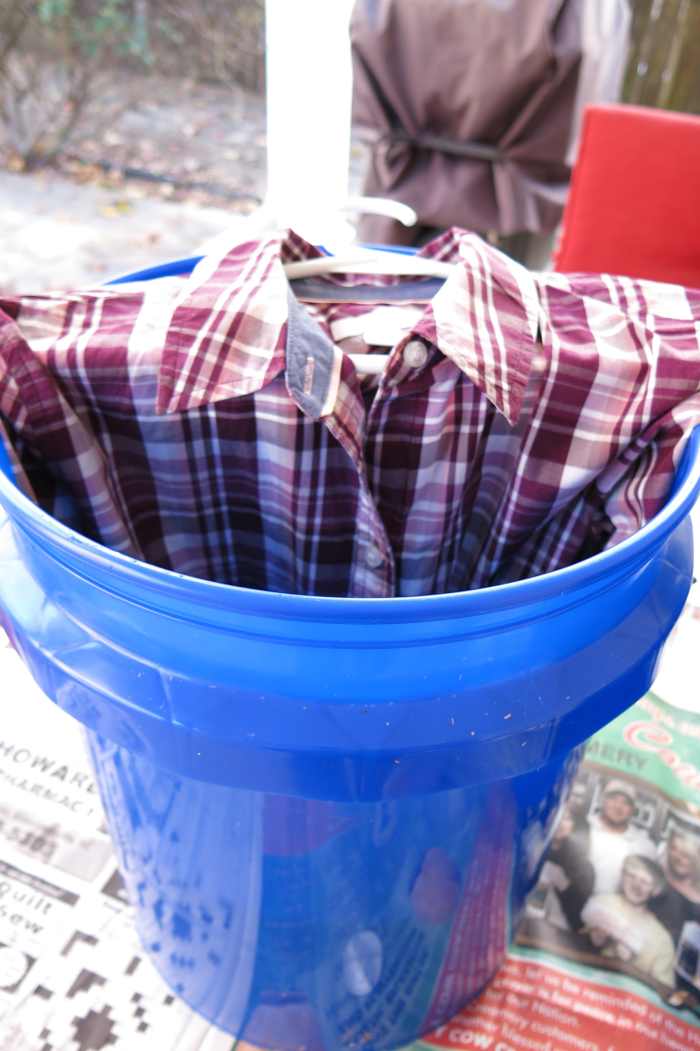
3. Then, if you are bleaching your shirt from the top down, put your shirt on a well-fitting hanger and button it (if applicable).
4. Put on your gloves and goggles and keep them on throughout the bleaching process. Then, in a clean bucket, make a generous mixture (enough to cover the area of your shirt you want to bleach) of 2/3 warm water and 1/3 bleach. You don't really need to measure this mixture. You can just approximate it.
If you have another bucket available, fill this with cold water.
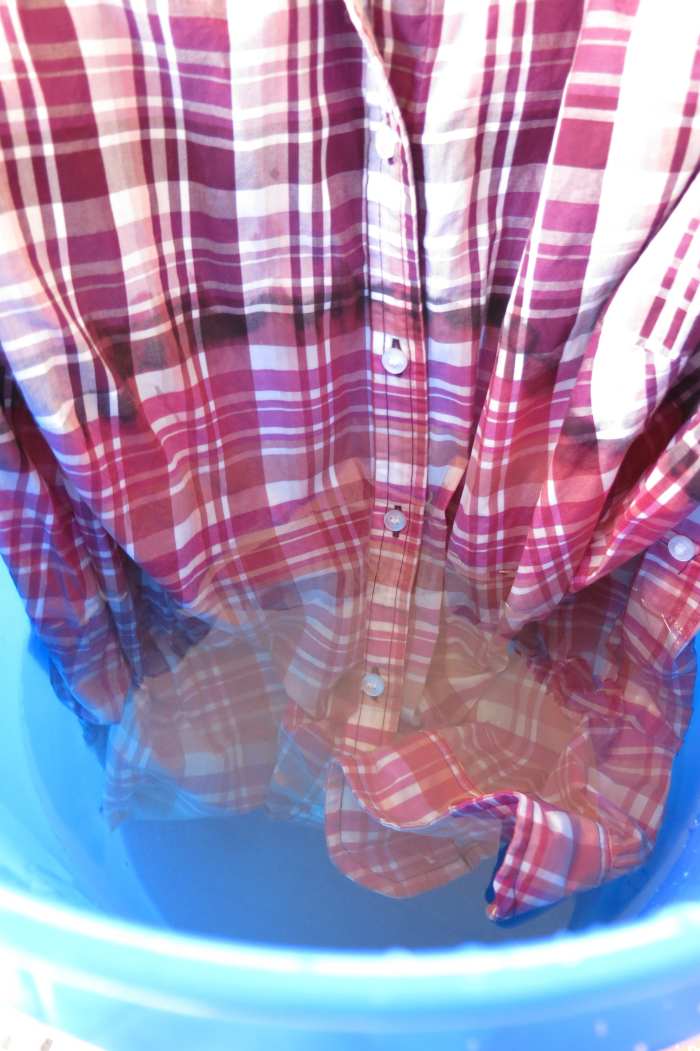
5. With your shirt on its hanger, submerge your shirt in the bleach mixture to the point where you want to begin your color change (if you do not want to bleach your sleeves, leave them outside your bucket throughout the bleaching). The bleach will seep up a little on your shirt, so keep that in mind when placing your item in the bleach.
You can use a binder clip or clothespin to hold your shirt and hanger in the mixture if necessary.
6. The bleach will start working immediately, so stay with your item and watch for the color change. This is why it is important to work in a well-lit space. I wanted to have a very gradual color change on my shirt, with the ombré effect going through many steps. However, I didn't see how much bleaching was taking place, so I only was able to get three color changes on my shirt.
Watch for the initial color change.
(c) purl3agony 2016
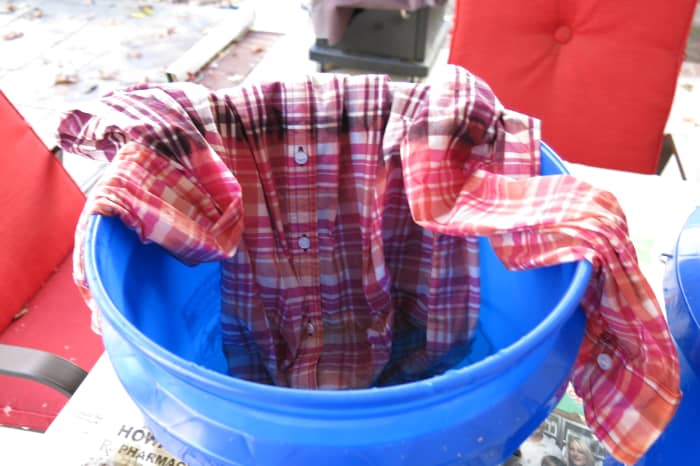
7. Once you see the initial color change on your shirt that you want, pull your shirt out a few inches from the bleach mixture. Leave the remainder of your shirt in the mixture to continue a further color change. This will create multiple steps in your ombré effect.
Pull your shirt out at even intervals.
(c) purl3agony 2016
Read More From Bellatory


8. Continue to pull your shirt out of the bleach mixture at even intervals to get the effect you want. I pulled my sleeves out of the mixture before my last bleaching so they would be slightly different in color than the bottom of my shirt.
Submerge your shirt in cold water.
(c) purl3agony 2016
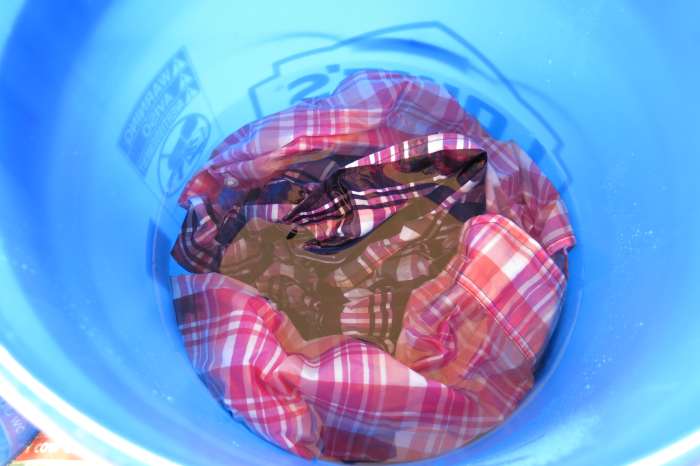
9. Once your ombré bleaching is complete, submerge your shirt in a bucket of cold water for about 10 minutes. Be careful of dripping your bleach mixture as you move your item. Swish your shirt around in the water to rinse it.
10. While your shirt is in the cold water, dispose of your bleach mixture in a safe manner. Rinse your bucket and use it to make a mixture of 2/3 cold water to 1/3 distilled white vinegar. Again, these measurements can be approximate.
11. After 10 minutes in the cold water, move your shirt to the distilled vinegar mixture. Leave it to soak for about 10 minutes. The vinegar will stop the action of the bleach on your clothing.
12. After the vinegar soak, wrap your clothing item in an old towel. Wash it in your washer using cold water and a little bit of detergent. Then dry per the instructions on the clothing label.
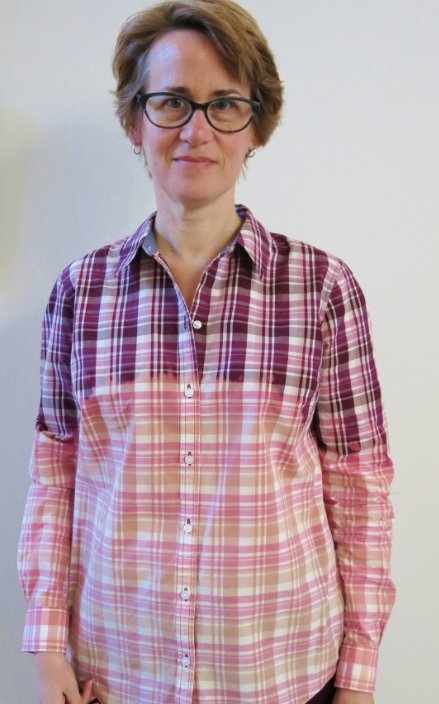
Ombre bleaching a shirt
(c) purl3agony 2016
I was surprised but pleased with the color changes in my shirt with ombré bleaching. It's a little hard to tell in the photos, but the bottom of my shirt is paler than the upper bleached area.
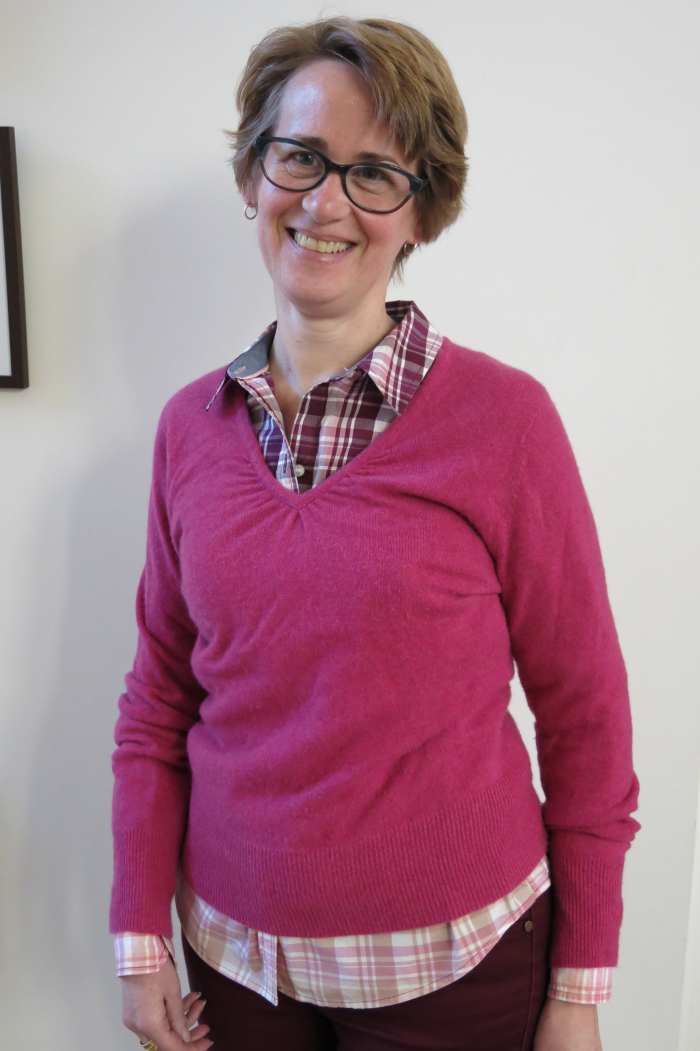
The shirt also looks nice under a sweater.
(c) purl3agony 2016
I particularly like how this shirt looks under a sweater for the colder months, with the unbleached section showing at the collar and the bleached bottom hanging out under my sweater.
Again, this look might not be for everyone, but you may want to give it a try. You might like it!
Questions & Answers
Question: If I put the fabric in the bleach mixture slower, will it change the finished appearance of my garment?
Answer: Yes, I think if you slowly introduce your fabric to the bleach mixture, it will have a more graduated fade than my sample.
Question: Can I reuse the bleach to ombré shirt or do I need fresh bleach for each shirt?
Answer: Yes, I would use fresh bleach for each garment. I would also wash out your container between projects. You don't want the dye from your previous garment to transfer to another shirt.
© 2016 Donna Herron
Comments
Donna Herron (author) from USA on December 16, 2018:
Great! There's nothing more exciting than wearing something you've made yourself. Enjoy!
Angel on December 11, 2018:
I love it. I added an metallic appliqué on back that’s says “be happy”. Can’t wait to wear!
Donna Herron (author) from USA on December 11, 2018:
Sounds beautiful! I hope you like it!!
Angel on December 10, 2018:
So I dip bleached mine and it went three tone with blue on top, reddish center and burgundy at end. Very curious but cool
Donna Herron (author) from USA on December 08, 2016:
Thanks, Heidi! I accidentally on purpose bleached this shirt a little more than I wanted to and in some places that I didn't intend. But that's part of loving the finished product, even if it's not the result you expected. I actually love the soft pink that the color of this shirt turned to at the bottom. Thanks so much for your comments and share. I appreciate it!
Heidi Thorne from Chicago Area on December 07, 2016:
I never even knew this was a thing! Thanks for the education. It looks very cool. Would be a good way to repurpose on purpose some items that may have "creatively" (also known as "accidentally") received some bleaching effects from being in the wrong place at the wrong time in the laundry room. :) Sharing!
Donna Herron (author) from USA on December 07, 2016:
Hi Sally - Thanks so much! This is a technique that can definitely grow on you. When I first bleached this shirt, I thought I had ruined it. But when it was washed, dried, and pressed I really loved the look. Now it's one of my favorite shirts. Thanks for stopping by and commenting. I appreciate it!
Sally Gulbrandsen from Norfolk on December 06, 2016:
Interesting! You taught me something new Donna. Great to see you looking cheerful and happy in your Ombré dyed shirt. Nice one!