DIY Fashion: Beginner T-Shirt Weaving
I love to dye my hair all colors of the rainbow. I love all things vintage, and I enjoy creating art, taking photos, and doing it myself.
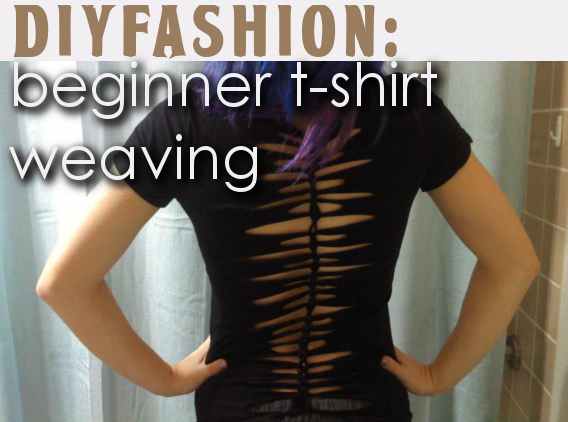
Learn how to weave your T-shirts into striking patterns.
author
Materials
Before you start this, you'll need to gather a few things. Luckily, this is a pretty simple DIY project.
- T-shirt. Pay attention to the material of your T-shirt, as it may fray. Try to stick to cotton, polyester, or microsuede.
- Scissors
- Possibly a safety pin or two
Step 1: Cut Strips
Before you even think about weaving, you need to cut some strips.
- Make parallel cuts about an inch apart from each other down the side of the shirt.
- I suggest making horizontal cuts for optimal fabric-curling ability. Diagonal and vertical cuts tend to lay flat and act weird.
- You can make the cuts all the same width or vary the widths (as pictured below).
- Once you've cut your desired amount of strips, stretch them out so the fabric starts to curl. This will make the edges look more uniform and clean.

Vary the widths of your strips as you see fit! Get creative.
author
Step 2: Choose a Weaving Pattern
The awesome thing about weaving is that it looks like it's really complicated and takes an immense amount of talent. The reality is that any old bum with two fingers could do it. Once you learn the pattern, whatever pattern you choose, you just keep repeating it with every strip.
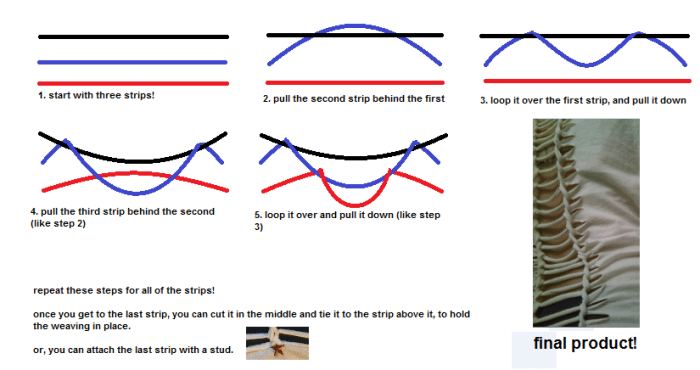
How to do a ladder weave.
author
Ladder Weaving
Ladder weaving is probably the most common type of weaving, and it's really quite easy to do. Although it is easy, if I tried to explain it in words it would be too confusing. I've created the illustration above to detail the basic ladder weaving pattern.
A basic ladder.
author

How to do a chain weave: Pull it. Twist it. Bop it.
author
Read More From Bellatory


Chain Weaving
This next method is strikingly similar to ladder weaving, but with one added step.
- When you get to part 3 of the ladder weaving infographic, twist the bottom of the "blue" strip to create a loop.
- Then, when you get to part 4, pull the "red" strip through the loop of the "blue" strip. Then, repeat!
In case that was ridiculously confusing, check out my killer Paint skills in the illustration above.
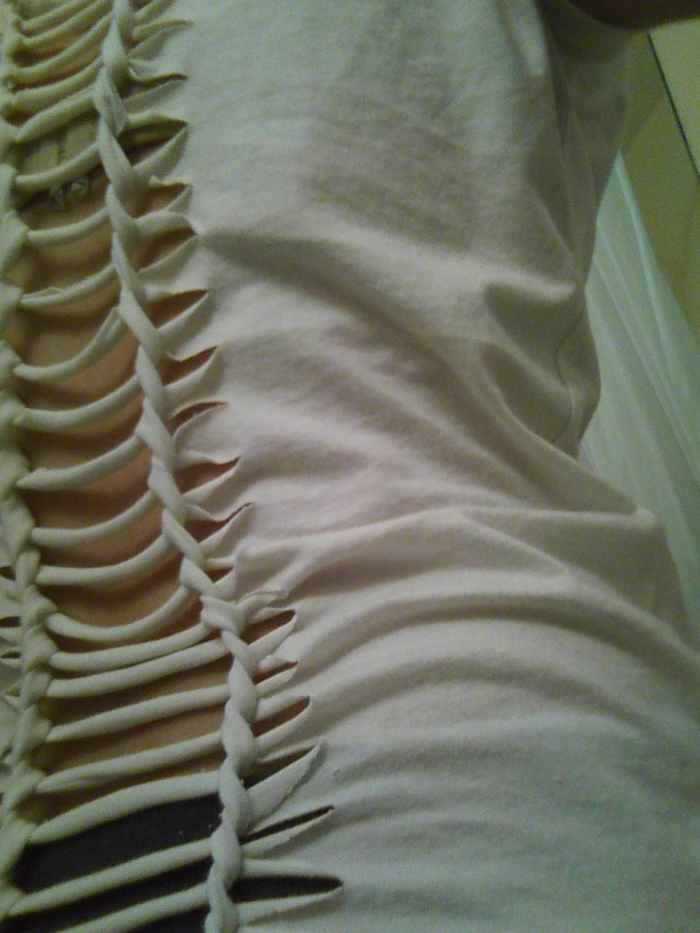
A T-shirt with a chain weave.
author
Step 3: Tie It
You've got to secure the last strip so that your hard work doesn't unravel before your eyes. In order to do this, cut the last loop/strip in half, and then tie each end to the strip above. Double knots are your friends!
If you don't want to cut the strip, you could also just safety pin it down, or tie the last two strips together with a ribbon.
Optional: Combine Weaving Methods
If you want to jazz up your T-shirt even more, try combining weaving methods! Cut your strips extra wide, and use the ladder weaving method. Then, you can come back through and use the chain weaving method. It'll end up looking like the one in the video below.
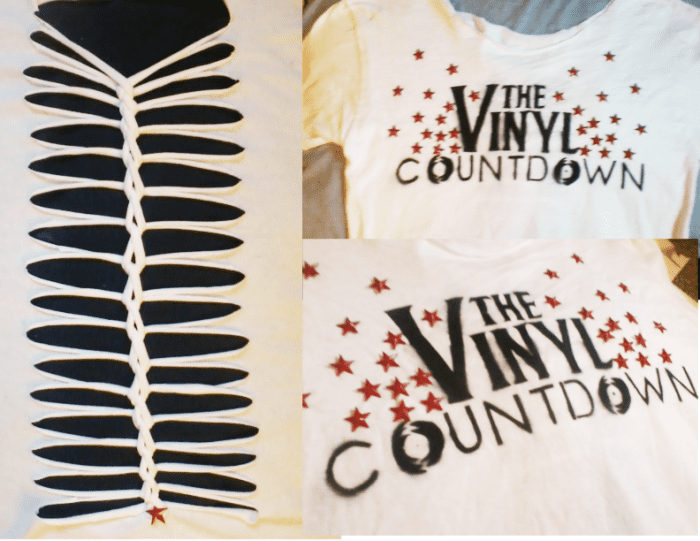
Even the most complex-looking woven T-shirts are quite simple to make. Just by combining two styles of weaving, or even repeating one style, you can end up with some awesome designs. The example below utilizes only ladder weaving, repeated four times.
So, grab some T-shirts, get creative, and start weaving! It really is that simple—cut, stretch, weave, and secure!

Ladder weaving repeated four times.
More Fashion DIYs
I'm frequently cutting up and remaking my clothes. If you're into the same sort of thing, check out some of my other DIY articles: