DIY Fashion: How to Take in a T-Shirt
I enjoy fashion and looking trendy on a budget. I also create art, take photos, and save money by doing things myself.
I have SO many t-shirts that are just a tad too big. Mainly, they come from concerts, events at school, clubs, and so on. Most shirts from these events are in men's sizes, and a men's small doesn't cut it for me. So when I find myself with oversized shirts, they usually end up being used as sleep-shirts, or I don't wear them at all.
I also have a radio show that I sell shirts for. I make the shirts myself, and knowing how to take them in a size really helps: if someone orders a large and I only have XL shirts, I can take one in pretty quickly and still make the sale.
Sometimes, I find a really awesome t-shirt for someone else! Then I look at the tag, and it's a size too big. If they don't have the right size, it either means you don't get the shirt, or you deal with it being baggy.
Well, to take a shirt in a size is actually pretty easy—it's a useful skill, and it results in a lot of these shirts actually being worn more.
Tools
To take in a shirt, you'll need a sewing machine (unless you're a master seamstress), thread, scissors, a washable marker, your oversized shirt, and a shirt that is the proper size.
Make sure your scissors are extra sharp! If you plan on working with fabric more often, I suggest getting a pair of scissors just for fabrics—you don't want to dull it on other things.
As for the thread you use, try to get the color as close to that of your shirt as possible. Sometimes though, it looks really cool to use different colored thread—like, red thread on a black shirt.
You'll also need two shirts—say you're trying to make a medium shirt from a large. Grab one of your medium shirts and use it as a pattern for the large one.
You also need a washable marker to mark where you need to sew.
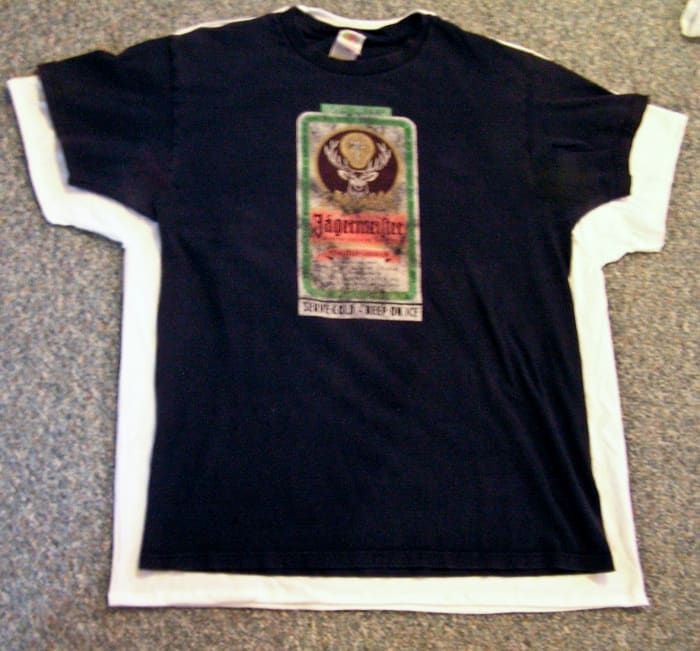
One shirt, two shirt, white shirt, Jaeger.
Step 1: Marking the Size Difference
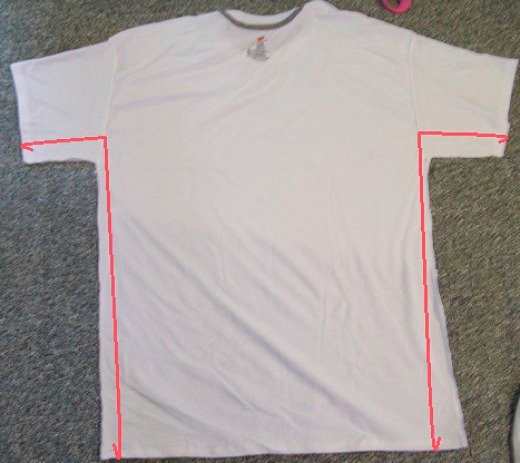
Take your larger shirt and lay it inside-out, flat on the ground. Then, lay your smaller shirt on top of it. Line the necklines of the shirts up.
Using the smaller shirt as a pattern, take your marker and lightly make a dashed line from the bottom of the sleeves to the armpit seam, and then vertically down the side of the shirt. Do this on both the right and the left sides, making sure they're even.
The biggest difference in sizes is in the width of the shirt—it will still look normal if you leave it at the same length. For this shirt, I also left the length of the sleeves the same —it didn't look much different after the alterations.
Now, get your sewing machine out!
Sew sew sew your shirt, gently down the seam!
Read More From Bellatory


Step 2: Sewing
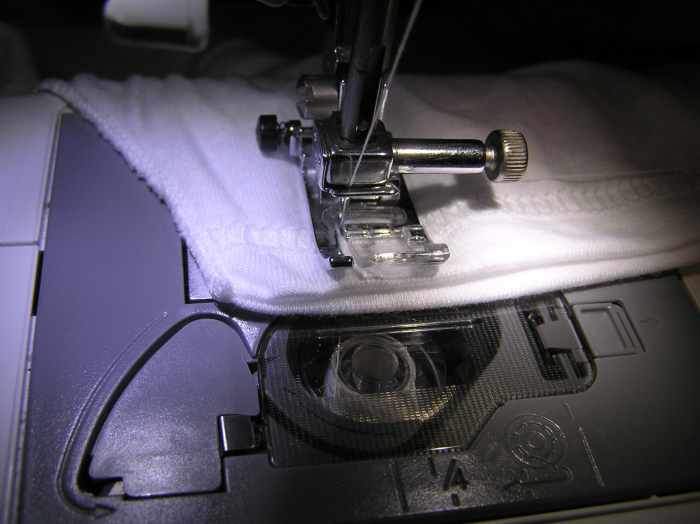
Follow your sewing machine's instructions for spinning the lower thread. Once your machine is all threaded, set your stitch! I always use a stretch stitch on t-shirts—it looks like a lightning bolt.
When you're ready to sew, you can start at either the sleeve or the bottom hem of the shirt. Make sure it's inside out! Wherever you start, make sure you sew towards the seam first.
Sew in straight lines. Once you reach the armpit seam, that's when you change direction. Don't do it before or after, or it'll look funny!
I usually start an inch away from the end of the sleeve—and then once I get to the end, I leave the needle where it is and switch directions. I'll sew to the armpit seam, turn 90 degrees and then keep sewing down. I'll sew down the shirt until I reach the bottom seam, and then sew back up an inch. This keeps you from having to tie knots and stuff. It's confusing to explain, but here's a picture to help.
Follow the red lines! Basically, you're double-stitching at the ends to reinforce your stitch.
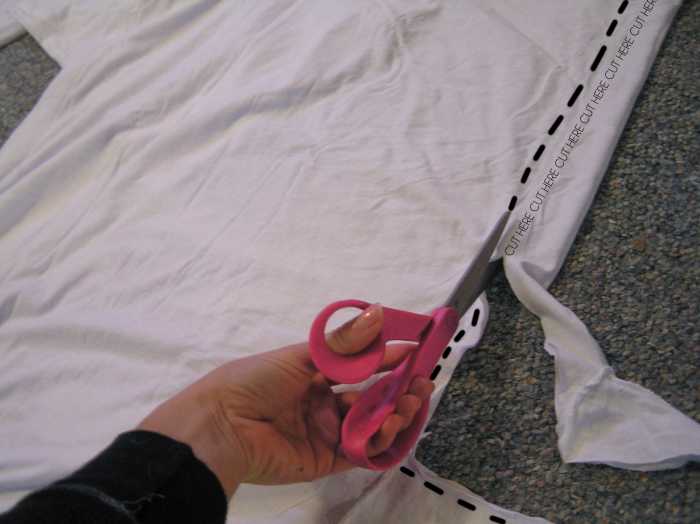
Step 3: Cut Off the Excess
Once you're done sewing, cut the ends of the string off so they're not hanging out. Also, trim off the excess fabric from the sleeves and sides of the shirt.
Don't leave it on, or it'll make you look frumpy! Cut about a centimeter away from the seam you just sewed.
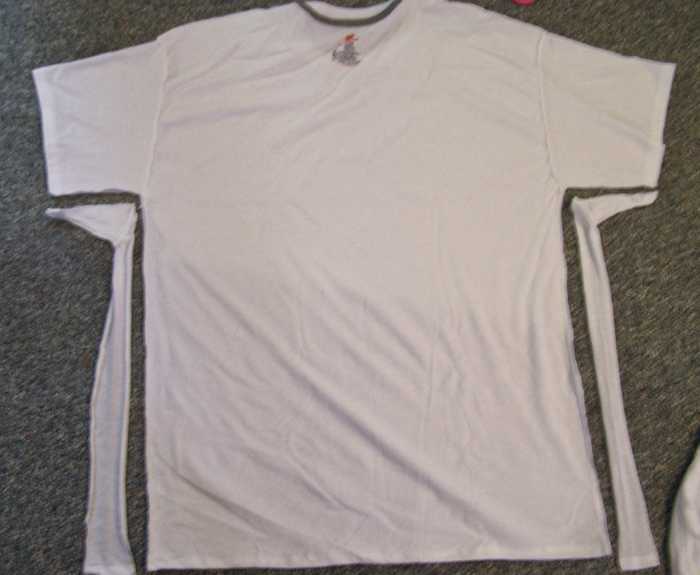
XL to L!
You're Done!
That's all there is to it. Your shirt should fit wonderfully now, so you can wear it in public without looking like a bum! If you're looking for other jazzy things to do, you can cut it all up again, or add a design. I've got a few t-shirt tutorials out there, so play around!
Don't let an oversized t-shirt hold you back!
© 2014 Alex Rose
Comments
twohanded on April 16, 2016:
I take in T shirts all the time for my lesbian friends, they buy butch men's T shirts and they want to wear them looking normal for them.....
Alex Rose (author) from Virginia on January 12, 2014:
Comes in handy for me with concert t-shirts. They're usually sold out of the right size, so I have to get a giant one! I've made XL shirts into smalls before!!
Claudia Mitchell on January 12, 2014:
I don't usually have this problem, I like big oversized tshirts, but I love this idea. Sometimes I'll see a tshirt on sale for some ridiculous price, but it's too big and this is the perfect solution!