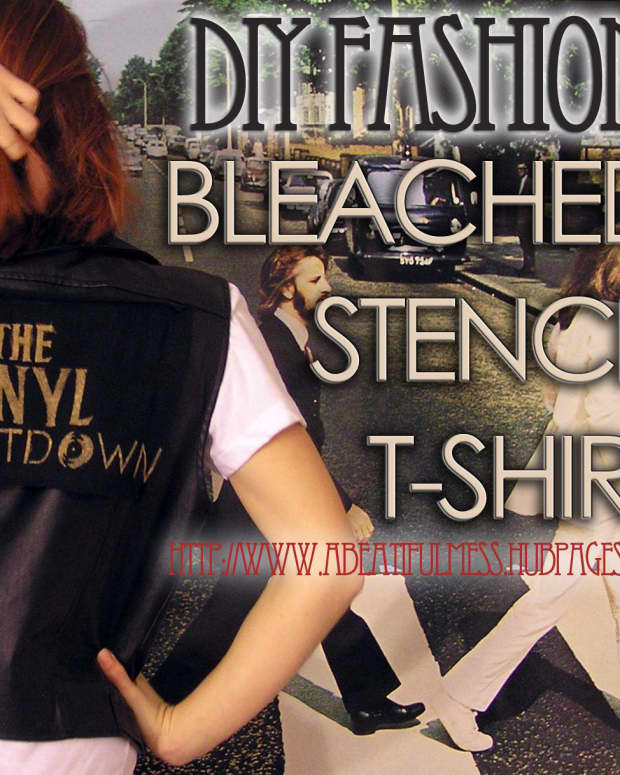
DIY Fashion: 10 Ways to Make a Cut Shirt
I enjoy fashion and looking trendy on a budget. I also create art, take photos, and save money by doing things myself.
Ten Ways to Cut a Shirt

My best Axl Rose impression
1. No Sleeves
This is probably the simplest way to add some personality to a t-shirt. All you do is—you guessed it—cut off the sleeves! I find this works pretty well for band tees.
There are several different styles you can do with this. You could easily just cut the sleeves off around the seams, or make the armholes larger by cutting further down on the shirt. This will look pretty nice with a bandeau top or a bedazzled bra underneath.

This technique is particularly successful in attracting steampunk carnival sideshows.
2. Bare Sides
This is a fun one, and it's also one of the easier techniques. Act like you're cutting off the sleeves, but just keep on cutting till you've reached the bottom of the shirt! Then, you can put it on and tie the bottom corners so they fit your hips.You can throw this on over a bikini or bandeau, or wear a tank underneath.
Blue hair, don't care!
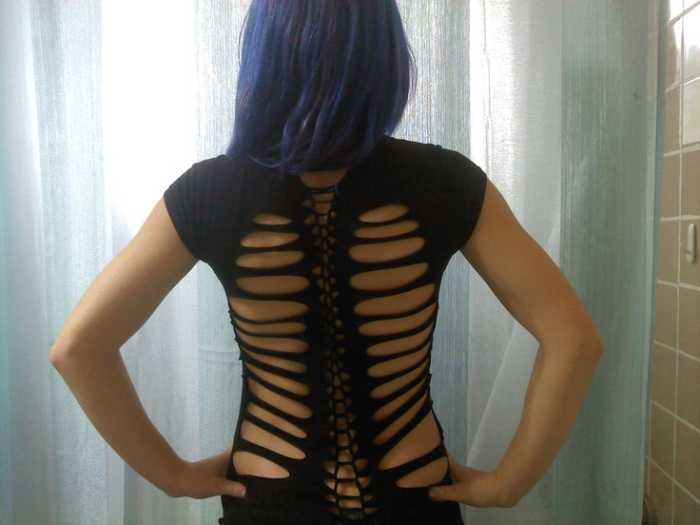
3. Stripe Cuts
Here's where it starts to get a little more exciting. With a pencil, draw lightly on the shirt where you want to make the cuts—they can be vertical, horizontal, diagonal, whatever you choose. Cut the shirt in smooth, clean lines. You don't want a jagged edge!
Once you've cut all you want, stretch it out. This helps to make the edge look cleaner, and it causes the places where you've cut to roll in a little. You can leave the cuts stretched out how they are, or weave them for a little more pizzazz.
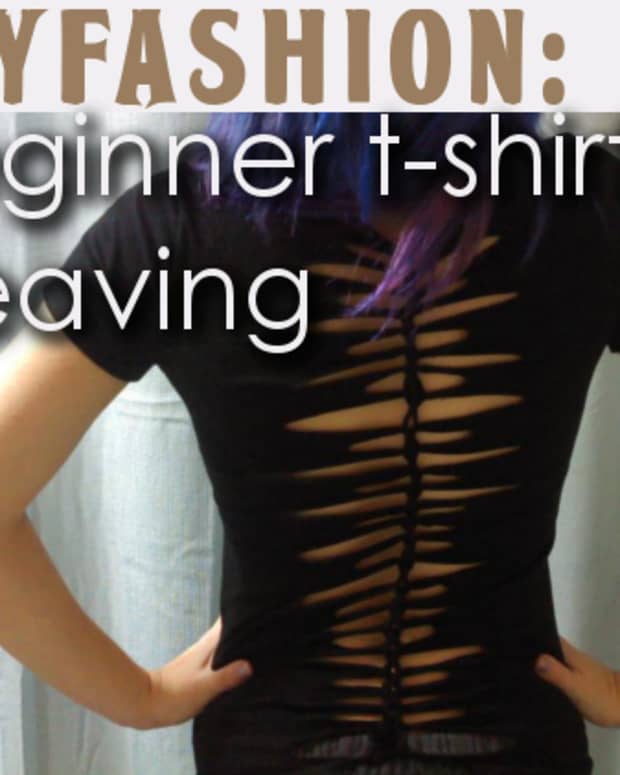
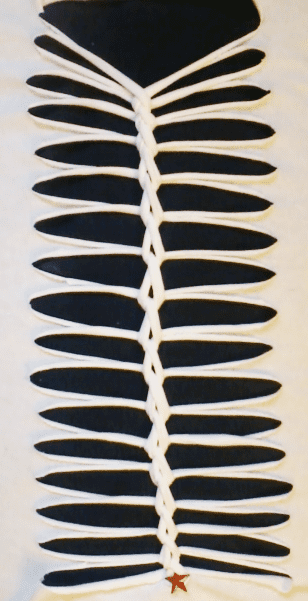
4. Weaving--Ladder Style
This is easier to show than tell about.
Basically, you cut a bunch of strips in the shirt. Pull the second strip under the first, and loop it over the top. Then, you pull the third one under the second and through the loop. Here's a pictorial, and a short video so you can get the gist of weaving!
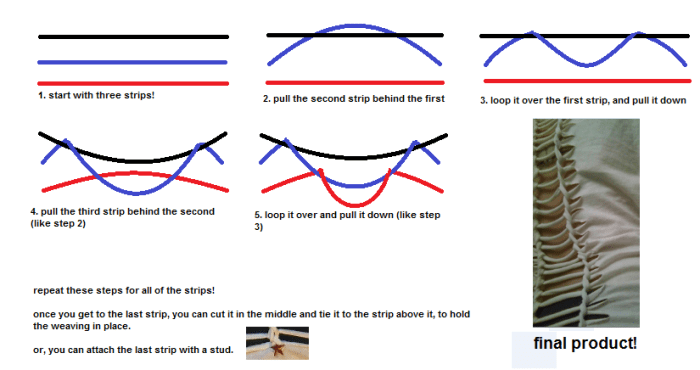
Weaving made easy!
5. Twist Weaving
You can do different variations with the weaving. To make a shirt like this one, between steps 3 and 4 of weaving in the pictorial above, just twist the strip of fabric to create a loop. Then, when you pull the next strip through, you'll put it through the loop.
Once you've done that, twist that strip to create another loop. Continue until you reach the last strip, and either tie it down or secure it with a stud. It's all patterns!
It's easier than it looks. And it looks really cool!
6. Fringe
Putting fringe at the bottom of a shirt is a really simple way to make it stand out. All you have to do is go around the bottom of the shirt and cut 1-inch strips of fabric as far up as you want. After that, pull them to stretch them out. Presto!
Read More From Bellatory


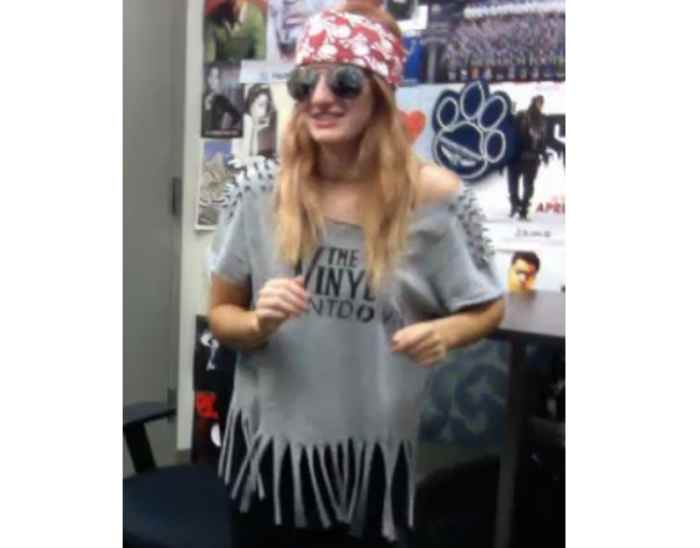
I channel Axl a lot.
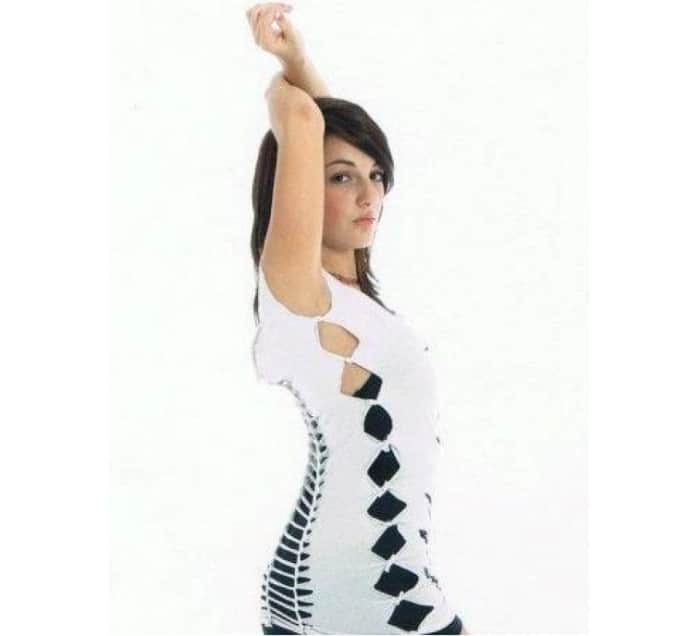
The triangles turn into diamonds!
7. Triangle Sides
To do this, cut the side of the shirt vertically—from the bottom of the shirt to the bottom of the sleeve. Lay the shirt flat, as if you were going to fold it, and make sure that the front and back evenly overlap.
From here, simply cut triangles out of the side of the shirt, running from the bottom of the sleeve down (see photo above). Discard the cutouts, and stretch out the triangle shapes. Tie the corners of each triangle on the front to the corresponding triangle on the back, joining the pairs of triangle cutouts to make diamonds.
8. Tied Sides
This can be used to make a big shirt smaller, or to just spice up a normal shirt. Do the same steps as you would for the triangle-sides shirt above, but cut out rectangular pieces of fabric, instead of triangular ones, leaving strips. Then, you just tie the strips together.
You can cut as many strips as you want—they can run all the way down the side of the shirt, or you can just put one strip at the top and one at the bottom.
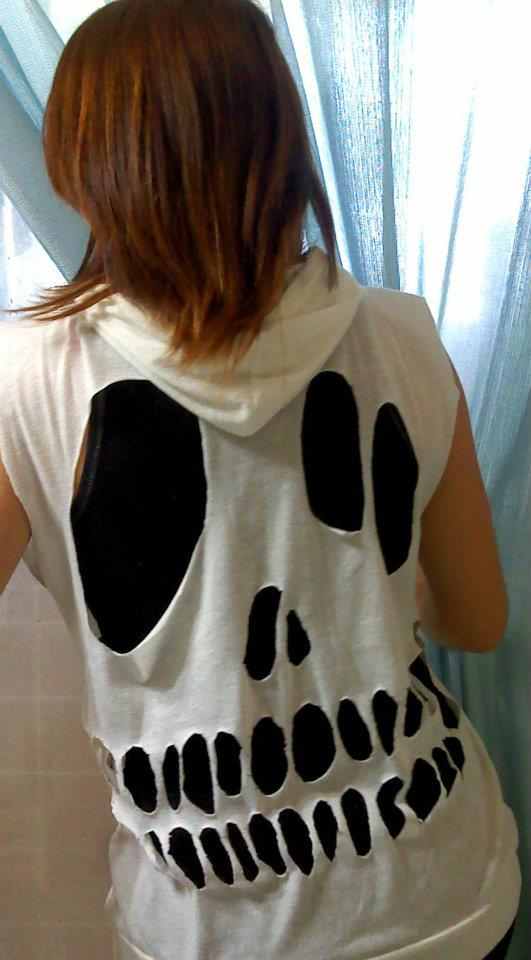
9. Picture Cut-Outs
Once, I cut up the back of one of my shirts to be a skull. It's basically the same idea as before, make clean cuts and then stretch them out.
For the skull shirt, I just kind of free-handed the outline. I outlined the areas to cut using dots, rather than lines, and cut out the shapes. Make sure that the fabric between your cutout shapes is thick enough that it won't rip when you stretch the cuts out. Keeping this in mind, it took a while to get all of the teeth cut out, but you see the result above.
I saw a photo of a cutout shirt in the shape of an eagle, and was dazzled, though I haven't tried it yet.
10. Combinations!
You can really combine any of these techniques. A picture on the back with weaving on the front, cut sleeves with fringe on the bottom, horizontal stripes with weaving (like the ribcage shirt in #3 above)—the sky is the limit!

Get creative!
More DIY Fashion Tutorials
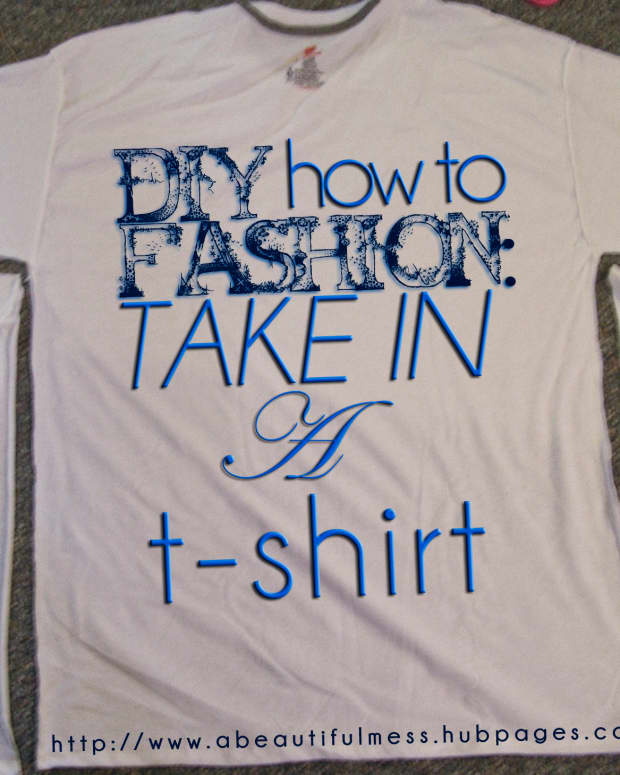
Try painting your own canvas shoes, taking in a t-shirt, or even printing your own t-shirts from home!
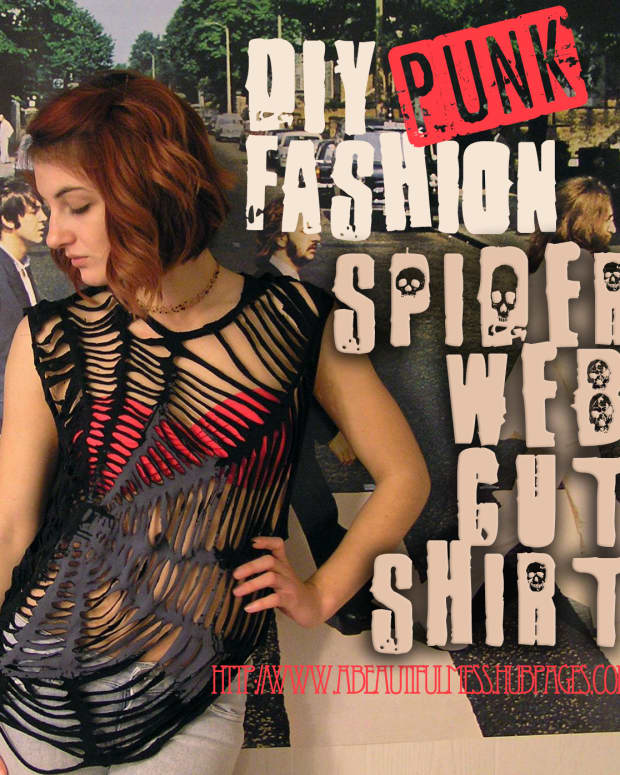
If you're up for some advanced t-shirt cutting, take a stab at this spiderweb cut shirt.
Oh, and here's my first DIY beauty articled describing how to make lipstick out of crayons. It's possible.
Comments
Ian Barron from Indiana on November 23, 2018:
Band tees and stuff like this look best with plain distressing too. Something like a few holes around the side and shoulder, a cut below the neck, and a few slashes around the hem give a really cool punk/grunge aesthetic while keeping the aesthetic of the tee mostly intact.